A couple of years ago, I put up a video of my choreography to Heart Attack by Trey Songz on Youtube. Since at the moment I'm unable to do a new video (but I promise I will soon), I figured I'd share the link to my video.
https://www.youtube.com/watch?v=mjLIdKkdzqU&list=UUcL8q7ezxv4Kd5_XRRx_RWw
Enjoy!
Tuesday, July 29, 2014
DIY #8 - Royal Crown Brooch

Hey there! I've been gone for a while I know....Driving school and learner's permits and things of that nature. But I'm back with a new tutorial! hopefully I can get a few things up this week to make up for my absence, but I'll see what's going on.
Either way, this tutorial has three different variations so it's pretty flexible.
Here it is!
Supplies:
-Polymer clay (I used Ultramarine blue and Jewelry gold Sculpey)
-X-acto knife
-Crown stencils (I printed from Google images)
-Scissors
-Wax paper
-Strong adhesive
-Mod Podge
-A paint brush
-Cream or white felt
-Gold leaf (I used Martha Stewart brand gilding sheets)
-Nail gems or tiny rhinestones
-Bigger rhinestones
-Birthstone gems (those little bottles that you can find at museums and such)
-Bar pins (pin backs)

Steps:
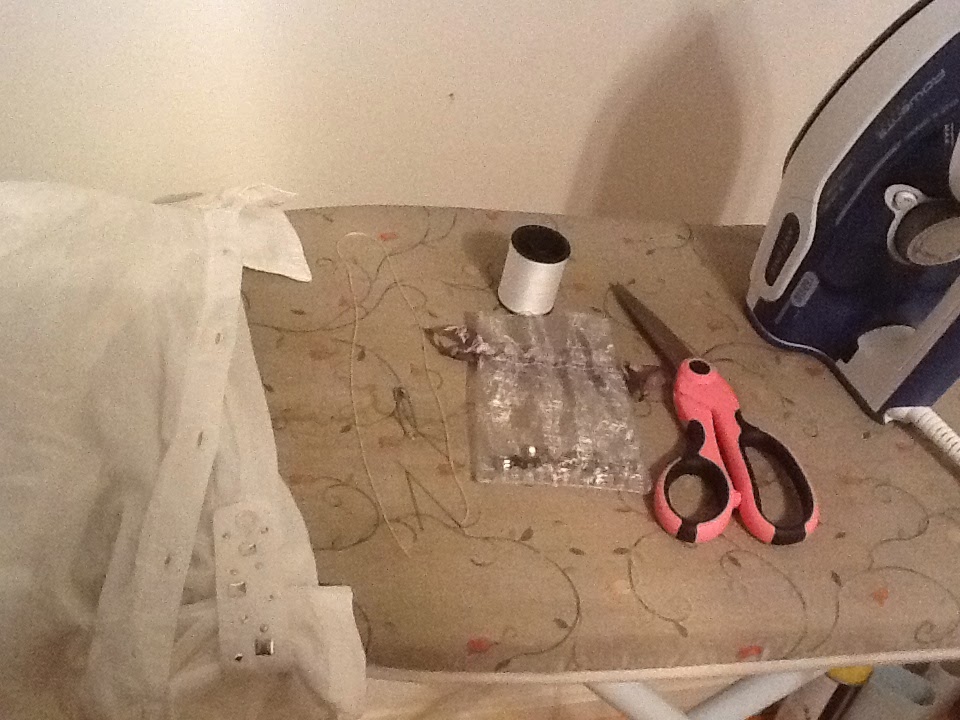
First, lay out your wax paper and supplies. Then cut out your stencils with a pair of scissors. If your crown designs have sections in the middle like mine, use your X-acto knife to remove the paper there.

After you have your stencils set, put them to the side and grab your clay. I used about half a section for each gold crown and about 3/4 of a section for my blue crown. The amount of clay you use depends on your crown size.
Condition your clay and roll it out to a thickness that works for you. Don't make it too thin though; you don't want your pin to be fragile.
Place your stencil on top of the clay and press it down so it stays in place while you're carving. Like this:

Use your knife to cut around the stencil first:

And then cu out the middle pieces if there are any before removing the stencil.

Repeat this process for each crown. I did two gold and one blue crown.

Now let's work on the blue crown.
After all your crowns have been cut out, take your blue one. I used my X-acto to rip off little pieces of the gilding sheets and pressed them into the unbaked clay. (Yes, you can bake these). I did my gilding randomly and it turned out like this:

I left the center top un-gilded because that's where my little rhinestones are going.
Next, place all you crowns on wax paper and a baking sheet and put them in the oven based on your package instructions. I used Sculpey brand, so I baked mine at 275 degrees Fahrenheit for 15 minutes, but your baking time may depend on the brand of clay you use.
Once your clay has baked, take it out of the oven and wait for it to cool. Then it's time to start decorating!
For the first gold crown, I used felt, nail gems and a big rhinestone. I cut a strip of cream felt to go at the bottom of the crown and used a big square rhinestone that I had leftover from my Split back Shirt tutorial. In addition, I used 11 gold nail gems to place on my crown in a row design. Once you plan out your design, use a strong glue to glue everything on. I had originally planned to use my hot glue gun, but opted for Loctite transparent adhesive. My first gold crown turned out like this:


Now for our last crown. The second gold one. For this one I used 4 silver nail gems and some Amethyst gems. I first glued the gems to the bottom left corner and left side, and the top right corner. You can glue your gems anywhere you want.
Then I made a straight line down the middle of the crown with the silver nail gems. Here is how it turned out:

After your glue dries, which takes about 4 hours for Loctite but I waited over night, you can flip your pins over and glue on the pin backs.

If you're crowns are anything like my gold ones, you make have to glue the pin backs vertically.
Once the backs are glued on and the glue is dry, you're done! You can wear one, two, or all or your pins at once if you want!
Enjoy!
Friday, July 18, 2014
DIY #7 - Split back Shirt

Hey! So I know I've been MIA for a few days but I'm back with a new tutorial. I've been swamped with these classes and my newfound obsession with the Kardashian Hollywood app. Don't judge me.
Anywho, this tutorial is inspired by the Split Back Shirt by Alexander Wang. It's super easy to do and does require some basic sewing skills, but if you absolutely are against sewing, you can always use a strong fabric glue that doesn't seep through your fabric or become visible.
Supplies:
-A button down shirt
-2 needles (one small enough to fit through the holes of the rhinestones)
-Matching thread
-Sew on rhinestones (rhinestones for jewelry making work too)
-Fabric scissors (or really sharp scissors if you don't have fabric scissors)
-Iron and ironing board
-Safety pin and pencil
Steps:
The first thing you want to do is plug in your iron and iron the back of your shirt so that you'll get a nice straight cut. You could also take this time to iron the front of the collar.

Next, try on your shirt and figure out how high you want your slit to be. Use a safety pin to mark the spot where you want your cut to stop. Be careful with this step, because you'll still be wearing the shirt! (I definitely poked myself a few times...) If you can, get someone else to pin it for you or to take a pencil and lightly mark it.
And make sure you make your mark a little bit lower than you want it. You can always cut a little more, but it's harder to fix if you cut too high.

After you pin it, take the shirt off and lay it on a flat surface. Use a pencil to lightly mark where the safety pin stops, making sure it is centered in the back of the shirt.

Using something with a straight edge, draw a straight line down the entire back of the shirt like this:

This line will give you a guide so that you are cutting straight.
Take your scissors and cut on the line so you'll get this:

Next, try on the shirt again so you can make sure the slit is as high as you want it to be. Once you're happy with your slit height, it's time to fix those rough cut edges.
Thread your bigger needle with a thread that matches your shirt and knot the end. We'll be using a simple in and out stitch for this and if you don't know how to do it, you can search online or simply use fabric glue. I hemmed my edges about 1/4 an inch.
Once you do that to both sides, (and a few stitches at the top of the slit so the shirt doesn't rip more on its own), you're finished on the back. You now have the basic slit back shirt. You can leave it like this or...

I decided to sew on some rhinestones to the collar tips. I first decided on a design and then threaded my smaller needle with my thread and sewed each individual rhinestone on, similar to sewing on a button.

I decided to invert the design on the opposite side of the collar, so that the black gems were on the outside and the clear gems were on the inside and so on...

And then you're done! Here is the front of my shirt once it was done:

(Yes, it's from Justice, once again don't judge me. I've had this shirt for years. Yes it still fits. Bleh.)
In case the final product pictures weren't clear enough, I'll post some more pics of me actually wearing the shirt on Instagram so you can see how good it really turned out. Just look up @danithedancer and I'll have some pics up in a few days.
Enjoy!
Sunday, July 13, 2014
My Mandatory Summer Reading List


Every summer, during the students' well deserved vacation time, my school gives us a list of three books that we must read over the summer...and do book reports on. Wow.
Anyway, as my third year at my school, this is obviously my third time writing book reports over the summer. But as I stated in the review post for The Fault in Our Stars, my friends and I influenced this year's book choices slightly. Luckily, juniors and seniors got these three easy books: The Fault in Our Stars by John Green, The Help by Kathryn Stockett, and The Last Song by Nicholas Sparks.
(Anyone else notice these titles all have 'the' in them?)
As you know, I've already read TFIOS and enjoyed it profusely. But...as much as I love reading, I'm also very lazy. And since it's already the middle of July basically and these reports are due the first day of school September 2nd...It's highly unlikely that I'm going to go out and buy the other two books and read them.
Especially since I have other books I'm reading right now.
And also especially because I've seen the movies for both books.
Yeah, I know it's cheating, but eh. It's good cheating. I might even be able to find them on Sparknotes.
But this will give me a chance to watch some movies on the couch with snacks without being referred to as 'not doing anything important'. So it's a win -win.
Another book that I know my sophomore friend has to read (she has a different list) is The Perks of Being a Wallflower by Stephen Chbosky. So we've all got some popular, movie made books to read it seems. (And that title once again starts with 'The'!)
Friday, July 11, 2014
DIY #6 - Cross Necklace

I'm back with another tutorial! My schedule has been slightly hectic do to Driver's Ed classes all this week and the next but I'm managing. Now, on to the tutorial!
Supplies:
-2 pairs of pliers (yes, I have baby ones.)
-8 gold jump rings
-Gold chain
-A gold lobster clasp
-A cross cut-out pendant (details below)

Steps:
I had already pre-created my pendant with some Sculpey polymer clay. I didn't take pictures, but it's easy enough to explain.
Taking your choice of color of clay, roll it out to the thickness you want. Then cut out a rectangle that is 1 1/2 inches by 1 1/4 inches.
With either a cross shaped cutter (if you have one) or free-hand with an X-acto knife, create your cross shape in the middle. Then add two holes at the top for the jump rings by piercing the clay with a needle and bake at 275 degrees Fahrenheit for 15 minutes.
Once you have your piece created, put one jump ring through the two top holes and one at the bottom of the cross like this:

Then add one more jump ring to the first three, like this:

Next, prepare your chain. Cut two pieces that are equal length and as long as you want them to be.


Then, taking a third shorter piece of chain, attach one end to the jump ring at the bottom of the cross, and the other end to a point on your chain that is just a few inches from your pendant. (I put my chain on the right side, but in the picture it looks flipped.)

Lastly, add the last two jump rings to either side of your necklace chain. I put my lobster clasp on the right side because I'm right-handed, but you can do whatever feels more comfortable.
And then you're done!
As always, I'll post pics of the necklace and how I style it on Instagram, just look me up @danithedancer.
Enjoy!
Tuesday, July 8, 2014
DIY #5 - Spiked Snapback

I love hats. Fedoras, snapbacks, beanies....all kinds of hats. But who really wants to pay all that money for an embellished hat when you can easily DIY one?
Supplies:
-Snapback in your choice of color
-Spikes (mine were screw back spikes that I got on Amazon, but any spikes will work)
-Hot glue gun and glue
-Optional: chain, a jump-ring, two pairs of pliers

Steps:
First, place your spikes on the brim of your hat so you can decide what design you'll use.
I went for a semi-uniform scattered rows kind of look, but you can do whatever you like. If you want to copy my design, you'll need 13 spikes. While you figure out your spike placement, plug in your glue gun.

Next, take your glue gun and start gluing the spikes to the hat. I would recommend gluing them down from one side and work your way to the opposite side. All you have to do is lift one spike up a few inches from your hat, put a dab of glue on the bottom and then press it back down in its spot.
Hold the spike down for a few seconds while the glue dries.

And that's all there is to it! However, once I finished gluing on my spikes, I realized I wanted a little extra on my hat. Soooo.....
I added a draped chain to the back on the actual snap part. I didn't take any pictures, but all I did was open a large jump-ring with two pairs of pliers, slip one link of my chain onto it, and hooked the jump-ring onto the first hole on the left side of the snap before closing the jump-ring again. With the other end of chain, I simply glued the last link to the end of the right side of the snap. I hope that's not too confusing..

In the end, this is how my chain looked if I were to wear the snapback backwards (and cocked to the side slightly).

And you're done! If you make your own spiked snapback, post a pic on Instagram and tag @danithedancer.
Enjoy!
Sunday, July 6, 2014
Dorothy Must Die
Back in April, I was out at the mall with some of my friends on a 'school field trip', and a few of us made our way into my favorite book store Barnes & Noble. My classmate found a stand that was holding these free Prepublication Excerpts and picked one up.
Well, needless to say, he only picked it up because it was free, so he handed it over to me.
What originally caught my eye on the cover of the book was that the author had the same name as me; Danielle. I was already pumped.
But then my attention was drawn to the title and cover picture shown above. Hmmm...It doesn't take a rocket scientist to realize that this book was a violent twist on the beloved story of Dorothy and The Wizard of Oz.
Me being me, of course, I always love it when someone takes an old story or legend and adds a new twist and life to it. Which is exactly why I saw the movies for Snow White and the Huntsman, Hansel and Gretel, and Maleficent.
And it is also why I plan to read this book by Danielle Paige.
The excerpt book I got gives you the first four chapters of the book as a preview, as well as an exclusive bonus chapter. The actual book itself though was released April 1st of this year.
Here is the synopsis verbatim from the back of the book excerpt so you can see if you're interested and pick it up:
There's a new girl from Kansas in Oz...
And she has a mission:
Remove the Tin Woodman's heart,
Steal the Scarecrow's brain,
Take the Lion's courage, and then -
Dorothy must die.
Saturday, July 5, 2014
DIY #4 - Spiderman Converse

I've been waiting to do this tutorial for quite a while now! I've revamped some old converse of mine into these cute Spiderman sneakers. Here's how:
Supplies:
-A pair of converse (I used white but you can use whatever color you want)
-Fabric paint in the colors red, blue, and black
-Paint brushes
-Painter's tape
-A sharpened pencil
-A paper plate or something to put your paint on
-Clorox wipes
-Newspapers
-Optional; black laces

Steps:
First, lay out your newspaper over your surface to protect it. Once that is ready, start unlacing your shoes.

With the laces removed, you then need to clean the rubber part of your shoes, including the toe, front, sides and back of the bottom of your shoe. Do this with a Clorox wipe.
*If you want you shoes to look brand spanking new, you could even take an old tooth brush or get one from the dollar store and deep clean the rubber on your sneakers.

All clean!

Take some of your painter's tape and start to tape off the rubber of your shoes. You only want to paint the canvas of the shoe. (Don't worry about the metal eyelets so much, the fabric paint can be scraped/cleaned off later.)

Roughly cover the Converse emblem also. It'll be difficult to cover it perfectly, but you are welcome to try.

With a little more tape, tape of the rectangular section perpendicular to the heel of the shoe like this:

With both shoes taped off the same way, its time to prepare our paint.

Taking the blue paint first, paint the rectangular section we just taped off.


Then turn the shoe around and paint the tongue blue as well. (I put tape across the inside of the shoe so that it would have something to lean on while it dried.)

By this time, the blue paint on the back of the shoe should be dry. Remove the tape from the sides of the rectangle and place one of them over it. It's time for the red paint.
Paint both sides of each shoe with your red paint like this:


Once that paint dries, you can then start making these shoes a little more Spiderman - esque.
On the outside panel of one shoe ( I chose the left one) lightly trace the outline of Spiderman's spider logo with your pencil. When you're happy with your stencil, dip that same pencil lead in the black fabric paint and use it to paint over your drawing.
You should end up with something like this:

You could also use a paintbrush to paint on the spider as well, but I find the pencil lines to be a lot more precise and clean.

On the inside of both shoes, meaning the side with the Converse star logo, I chose to draw on some webbing using the same pencil painting method from earlier.

When all your designs are placed and the paint has dried, begin to remove the painter's tape. You might find a few gaps where the paint missed but that's okay....

....because with a small brush you can just touch everything up!

After you've fixed any errors and the paint has fully dried again (at least four hours), you can lace your shoes again. I used my old laces but I'll probably eventually change to black laces....we'll see.

And bam!
You now have a pair of shoes based on your friendly neighborhood Spiderman!


I think if he was real, Peter Parker would totally own these.
If you make some, post a pic on Instagram and tag @danithedancer so I can admire them!
Enjoy!
Subscribe to:
Comments (Atom)